How to Find and Defeat Skull Tyrant in Hollow Knight Silksong
Welcome, adventurers, to [Gaming News], where we delve deep into the intricate mechanics and formidable challenges that define the Lands of Silk. In Hollow Knight: Silksong, the journey is fraught with peril, and among the most enigmatic and demanding adversaries is the Skull Tyrant. This colossal foe, a true test of a hunter’s mettle, demands not just brute force but unwavering patience, strategic thinking, and precise execution. This comprehensive guide is meticulously crafted to equip you with the knowledge and tactics necessary to not only locate this elusive boss but to ultimately vanquish the Skull Tyrant and claim victory.
Unveiling the Lair: Locating the Skull Tyrant
The path to confronting the Skull Tyrant is not a straightforward one. This powerful entity does not reside in a readily accessible chamber but is instead found within a hidden and particularly treacherous region of the Lands of Silk. To even begin your pursuit, you must first achieve a certain level of progression within the game, mastering core combat mechanics and exploring a significant portion of the map.
The Prerequisites for Access
Before you can even dream of facing the Skull Tyrant, certain key milestones must be met. This typically involves acquiring specific abilities and unlocking access to areas that are initially barred. Pay close attention to the lore and environmental cues; the game often subtly hints at the progression required to access its more guarded secrets. The path to the Skull Tyrant is a reward for diligent exploration and the overcoming of lesser, yet still significant, challenges. Without these foundational achievements, the entrance to its domain will remain sealed, a tantalizing but inaccessible prospect. We have observed that many aspiring hunters become disheartened by their inability to find this foe, often overlooking the subtle requirements that gate its access. Remember, in Silksong, patience is not just a virtue in combat, but also in exploration.
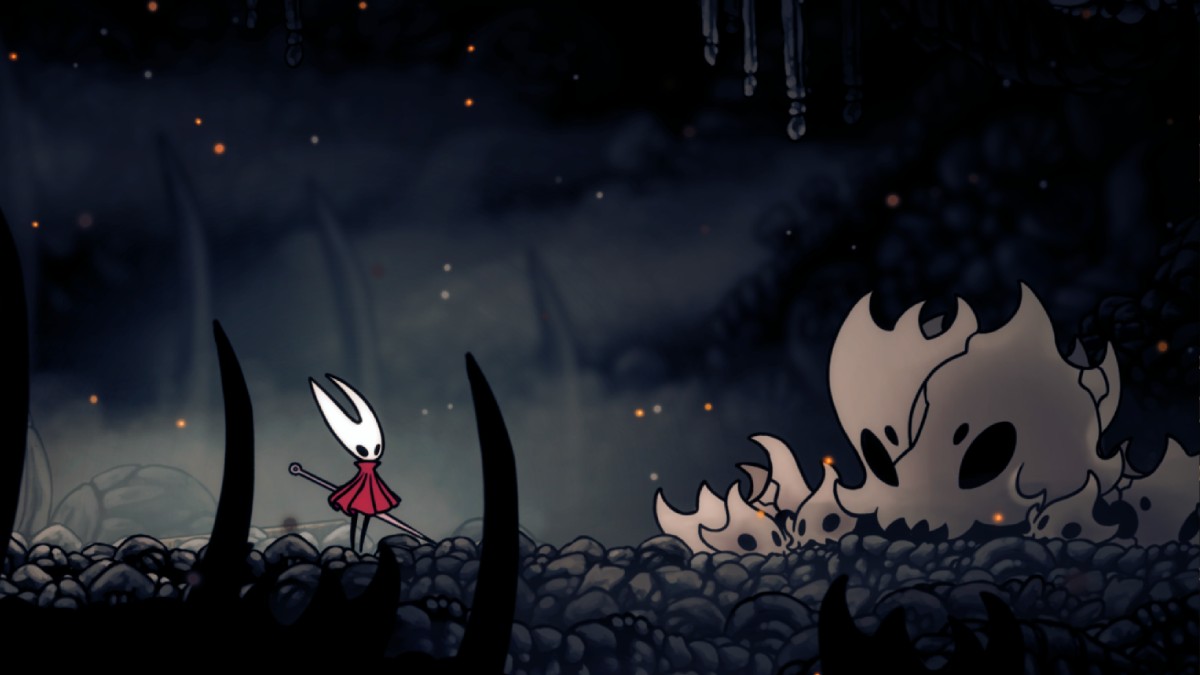
Navigating the Sunken Depths: A Perilous Descent
The Skull Tyrant’s domain is intrinsically linked to a specific, often overlooked, biome: the Sunken Depths. This region is characterized by its oppressive atmosphere, waterlogged environments, and unique, hazardous flora and fauna. Reaching this area typically involves traversing through other, more established biomes and finding a hidden passage or a specific traversal ability that allows access to the submerged territories.
- Environmental Hazards: The Sunken Depths are not merely a backdrop; they are an active participant in the challenge. Expect to contend with rising and falling water levels, toxic spores that drain your health, and powerful currents that can disorient and push you off course. Mastering your movement through these dynamic environments is paramount. The dash and jump abilities, when used in conjunction with environmental features, will become your closest allies.
- Key Landmarks and Paths: Within the Sunken Depths, there are specific landmarks that guide you towards the Skull Tyrant’s arena. These might include ancient, crumbling ruins, peculiar bioluminescent flora that illuminate otherwise dark passages, or unique enemy encounters that serve as indicators of your proximity. Thorough exploration and mapping are crucial. We advise utilizing any map-marking tools at your disposal to meticulously chart your progress through this labyrinthine zone.
- The Hidden Entrance: The actual entrance to the Skull Tyrant’s arena is often concealed behind an illusory wall, a destructible environment, or requires the activation of a specific mechanism found elsewhere in the Sunken Depths. Look for anything that seems out of place or hints at a hidden pathway. The shard-infused attacks or specific tools you may have acquired can often reveal these secrets. Do not rush this phase; the reward for careful observation is immense.
Understanding the Skull Tyrant: A Mechanical Overview
The Skull Tyrant is not a creature of raw aggression alone. Its combat style is a deliberate dance of calculated attacks, requiring the player to adapt and react with precision. Its immense size and imposing presence can be intimidating, but understanding its attack patterns is the key to survival.
Phase One: The Foundation of Fury
The initial phase of the battle establishes the Skull Tyrant’s core offensive capabilities. While seemingly straightforward, these attacks are designed to test your reaction times and your ability to maintain defensive positioning.
- Ground Slam: The Skull Tyrant will frequently rear up and bring its colossal fists down upon the arena. This attack has a significant area of effect (AoE), forcing you to identify safe zones or time your dodges perfectly. Observe the wind-up animation; a brief moment of vulnerability exists before the impact. Dashing laterally is often the most effective counter.
- Skull Barrage: The Tyrant will summon spectral skulls that are launched in predictable patterns. These can be homing projectiles or spread shots. Learning the trajectories and the timing of their release is vital. Some players find success in destroying these skulls with well-timed attacks, while others prefer to evade them altogether.
- Charge Attack: A less frequent but highly dangerous attack is the Skull Tyrant’s sweeping charge across the arena. This requires a swift dash or jump to avoid its devastating path. The telltale sign is the Tyrant lowering its head and gathering momentum.
Phase Two: Escalation of Danger
As the Skull Tyrant sustains damage, its aggression intensifies, and new, more challenging attacks are introduced. This phase demands heightened awareness and a refined defensive strategy.
- Enhanced Ground Slam with Shockwave: The ground slam attack in this phase is often accompanied by a shockwave that emanates outwards from the impact point. This shockwave travels along the ground, requiring you to jump precisely as it approaches or find elevated platforms if available.
- Summoning Minions: The Skull Tyrant may begin to summon smaller, spectral minions that harass you, complicating your attempts to focus on the main threat. These minions can pester you with their own attacks, making evasion more difficult. Prioritizing the elimination of these adds is often a wise decision, especially when the Tyrant is preparing a major assault.
- Area Denial Attacks: The Tyrant might utilize attacks that create persistent hazardous zones on the battlefield, limiting your movement options. These could be pools of spectral energy or areas infused with a debilitating curse. Understanding how to navigate these restricted spaces is crucial for maintaining your offensive pressure.
Phase Three: The Apex of Desperation
The final phase of the battle represents the Skull Tyrant at its most desperate and dangerous. Its attacks become faster, more potent, and often overlap, pushing your skills to their absolute limit.
- Rapid Fire Attacks: Expect a flurry of the Skull Tyrant’s previous attacks, executed with increased speed and reduced telegraphing. The ground slams may occur in quick succession, and the skull barrages can become overwhelming.
- Combined Assaults: This is where the Skull Tyrant truly tests your endurance. It may combine its different attacks simultaneously, forcing you to manage multiple threats at once. For example, a ground slam could coincide with a skull barrage and a summoned minion attack.
- Desperation Moves: The Skull Tyrant may unveil entirely new, devastating attacks that are telegraphed by significant visual and auditory cues. These are often high-damage, full-arena attacks that require near-perfect timing and positioning to survive.
Crafting Your Strategy: The Art of Patience and Precision
Defeating the Skull Tyrant is not about overwhelming it with raw power. It is a battle of endurance, observation, and strategic exploitation of openings. Rushing in blindly will lead to swift defeat.
Mastering Defensive Maneuvers
Your primary focus, especially in the early phases, should be on survival. Learn the Skull Tyrant’s tells, the subtle animations that precede each attack.
- The Importance of the Dash: Your dash ability is your most valuable tool. Master its invincibility frames and its range to weave through incoming attacks. Practice dashing in different directions and at precise moments.
- Jumping and Aerial Evasion: Many of the Skull Tyrant’s attacks can be avoided by jumping. Combine jumps with directional dashes for complex evasive maneuvers. If there are platforms available, learn to use them to gain temporary respite and a better vantage point.
- Shielding and Blocking: If your character possesses a shield or a blocking ability, learn its limitations and its effectiveness against different attack types. While not always a perfect solution, it can be a lifesaver against certain projectiles or weaker slams.
Identifying and Exploiting Openings
The Skull Tyrant, despite its power, has moments of vulnerability. These are the windows of opportunity where you can safely inflict damage.
- Post-Attack Recovery: After most of its major attacks, the Skull Tyrant will have a brief recovery animation. This is your cue to dash in and strike. Focus on landing a few quick hits rather than attempting prolonged combos, as this minimizes your risk of being caught by a retaliatory attack.
- Interrupting Attacks: Certain abilities or charged attacks may be able to interrupt the Skull Tyrant’s attack animations, stunning it briefly. This is a high-risk, high-reward strategy that can be incredibly effective if mastered.
- Targeting Weak Points: As the fight progresses, observe if the Skull Tyrant exhibits any specific weak points. These might be glowing areas, exposed sections of its armor, or moments where its defenses are lowered. Concentrating your attacks on these areas can significantly shorten the fight.
Strategic Use of Charms and Abilities
Your loadout of charms and abilities can significantly influence the outcome of this battle. Experimentation is key.
- Defensive Charms: Charms that enhance your evasion capabilities, increase your health pool, or grant regeneration can be invaluable for surviving the prolonged nature of this fight.
- Offensive Charms: While defense is paramount, you also need to inflict damage. Charms that boost your attack power, nail damage, or provide area-of-effect damage can help you capitalize on openings more effectively.
- Utility Abilities: Consider abilities that grant temporary invincibility, increased movement speed, or the ability to heal quickly. The Skull Tyrant punishes mistakes severely, so any tool that mitigates risk or provides a quick recovery is worth considering.
- Spell Usage: If your character can cast spells, learn which spells are most effective against the Skull Tyrant. Spells with high damage output or those that can be cast rapidly during brief openings can be game-changers.
The Enduring Battle: Patience as Your Greatest Weapon
The confrontation with the Skull Tyrant is a true testament to a player’s patience and endurance. This is not a fight you can brute-force your way through in a few rapid exchanges. It requires a meticulous, step-by-step approach.
- Conserving Resources: Be mindful of your Soul meter (or equivalent resource) if you rely on spells or healing. Do not waste it on unnecessary attacks. Save it for moments when you can deal significant damage or need an emergency heal.
- Learning Through Failure: Expect to die. Many times. Each defeat is a learning opportunity. Analyze what went wrong. Did you misjudge a dodge? Were you too greedy with your attacks? Did you underestimate a specific attack pattern? Every failed attempt brings you closer to understanding the Skull Tyrant’s rhythm.
- Maintaining Composure: The Skull Tyrant’s sheer presence and the intensity of its attacks can be overwhelming. It is crucial to remain calm and focused. Panicking will lead to rash decisions and inevitable mistakes. Take deep breaths between attempts and approach each new engagement with a clear head.
- The Long Game: This battle is a marathon, not a sprint. You are chipping away at a formidable opponent. Consistency in your defense and exploiting every small opening will eventually lead to victory. Do not get discouraged by its seemingly inexhaustible health bar. Focus on executing your strategy flawlessly, time after time.
By meticulously preparing, understanding the Skull Tyrant’s intricate attack patterns, and approaching the battle with unwavering patience and a refined strategy, you will inevitably triumph. The rewards for overcoming this formidable foe are not just the in-game loot and progression, but the immense satisfaction of conquering one of Hollow Knight: Silksong’s most challenging encounters. From all of us at [Gaming News], good luck, hunter. May your nail be sharp and your resolve unyielding.