Mastering the Marked for Death Quest in ARC Raiders: Your Definitive Guide
Embarking on your journey through the perilous landscapes of ARC Raiders presents numerous challenges, and among the early to mid-game objectives, the Marked for Death quest stands out as a crucial milestone. This particular mission requires a keen eye for detail and strategic navigation, as it tasks players with locating two distinct items nestled within the sprawling world. The game, in its characteristic fashion, withholds precise coordinates, leaving you to decipher the path forward. This can be a perilous endeavor, especially when encountering the formidable ARC enemies or, perhaps even more dauntingly, other human players who are equally determined to survive and thrive. At Gaming News, we understand the intricacies of ARC Raiders and have meticulously crafted this comprehensive guide to ensure your successful completion of the Marked for Death quest, maximizing your chances of securing valuable rewards and outmaneuvering your adversaries.
Deconstructing the Marked for Death Quest: A Two-Part Objective
The Marked for Death quest is elegantly structured into two primary phases, each demanding specific actions and careful exploration. By breaking down the mission into these manageable segments, players can approach the task with greater clarity and efficiency. We will delve into each part, providing actionable insights and strategic advice to streamline your progress.
Phase 1: Locating the Su Durante Warehouse
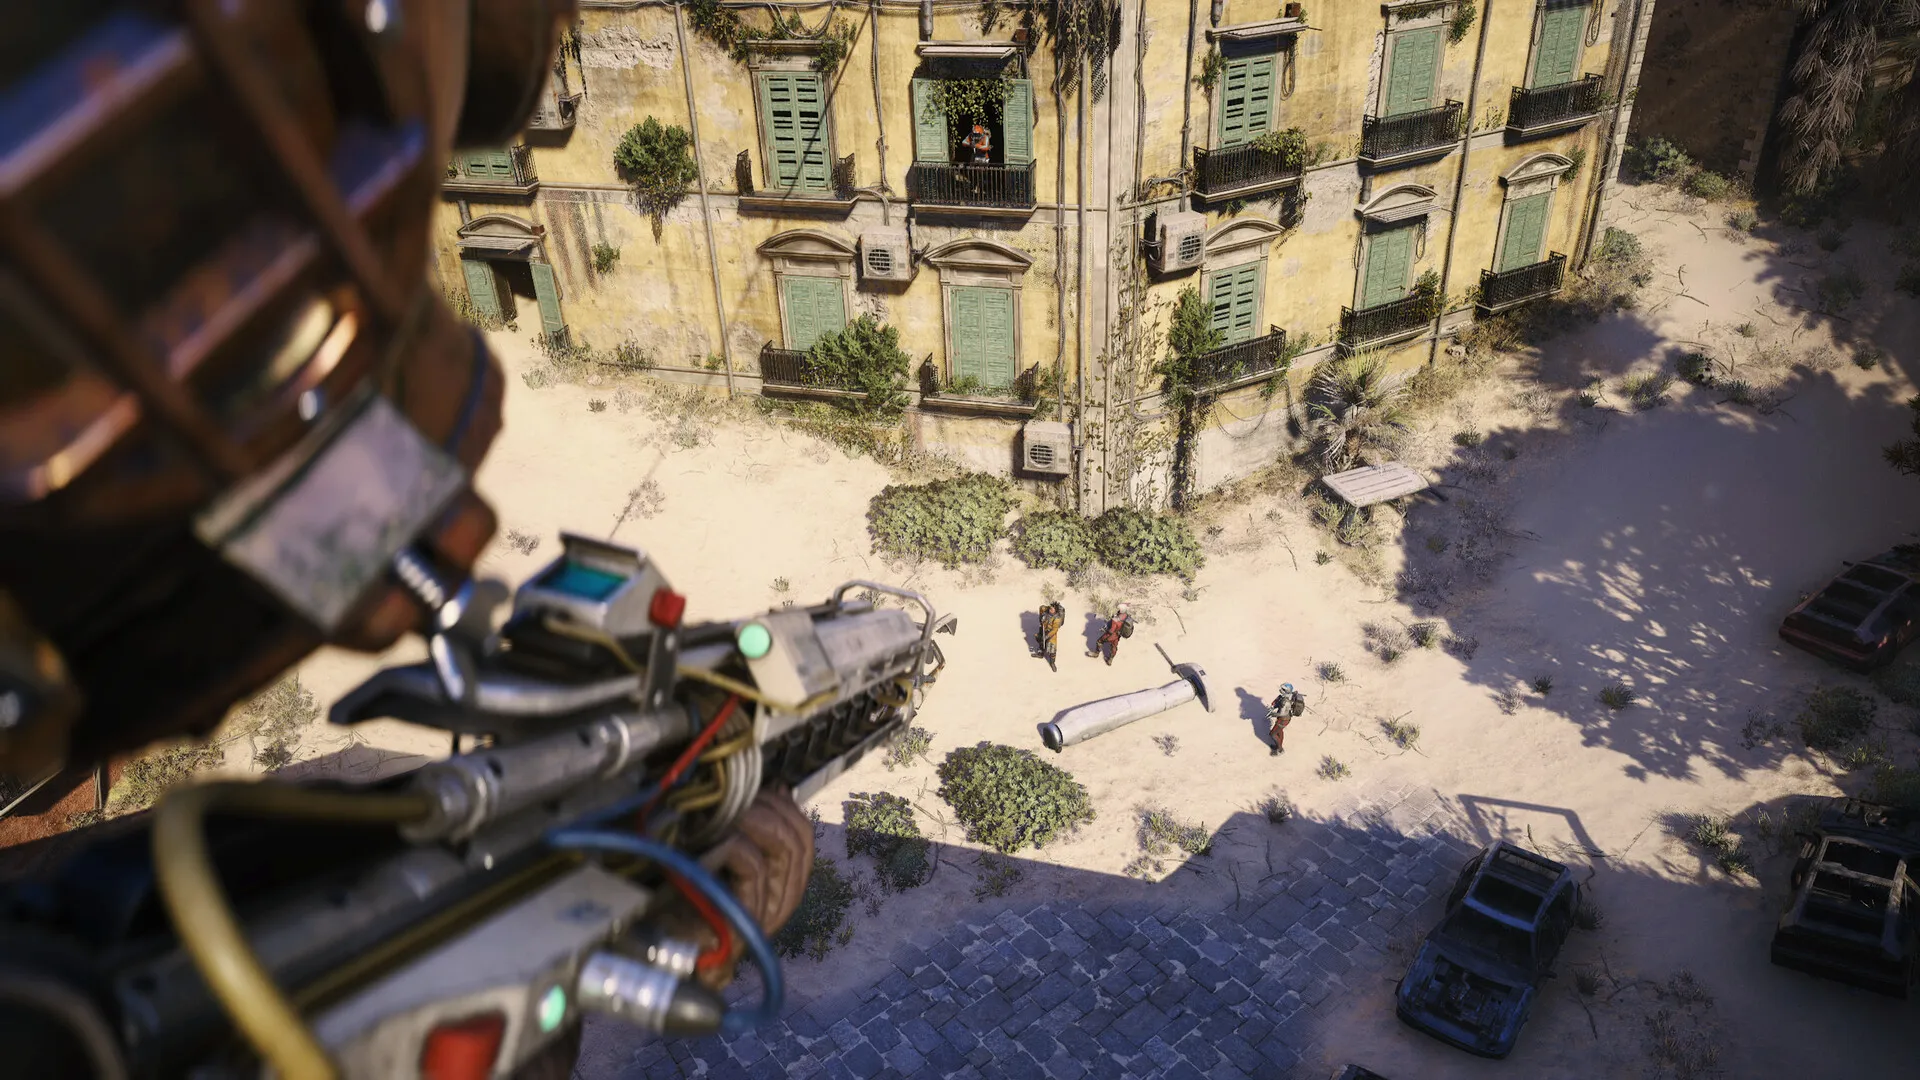
The initial objective of the Marked for Death quest directs you towards the Su Durante Warehouse. This significant location is situated in the north-western expanse of the Buried City. Your journey here requires precise movement and an understanding of the map’s geography. As you traverse the Buried City, orient yourself towards its top-left corner. Upon reaching this general area, you will need to descend. This descent will eventually bring you to the wall of the Warehouse, adjacent to which lies a large cache.
Navigating to the Su Durante Warehouse Cache
To ensure you are not wasting precious time and resources, it is paramount to understand the most efficient route. Once you have identified the Su Durante Warehouse, often a prominent structure within the zone, focus your attention on its rear. Many players mistakenly believe the objective lies at the front, but the crucial interaction point is typically found behind the building.
- Strategic Approach: When approaching the Su Durante Warehouse, consider employing stealth and tactical awareness. The areas surrounding significant landmarks like warehouses can often be hotspots for enemy patrols, both AI-controlled ARC enemies and other opportunistic human players. Utilize cover effectively, monitor your surroundings for incoming threats, and engage only when necessary. Prioritize speed and stealth to reach the cache without unnecessary conflict.
- Identifying the Cache: The cache itself is usually a distinct environmental object. Look for containers, crates, or specific interactive elements that visually stand out. The description mentions a “big cache,” so keep an eye out for something that appears substantial and out of place with the general debris of the Buried City.
- Confirmation of Completion: Upon successfully interacting with the designated cache at the Su Durante Warehouse, the game will automatically acknowledge the completion of this phase. A quest update notification will appear, guiding you seamlessly into the next critical step of the Marked for Death quest.
Phase 2: Unearthing Tian Wen’s Cache
With the first part of the Marked for Death quest successfully concluded, your attention shifts to the second objective: locating Tian Wen’s cache. This stage is often described as “relatively easy,” but this ease is contingent upon your ability to follow subtle environmental cues. The game ingeniously guides you through a trail of footsteps, leading from the previously discovered cache.
Following the Footsteps to Tian Wen’s Cache
The primary mechanic for this phase involves the visual representation of footsteps in the game world. These are not merely decorative but serve as direct navigational markers.
- Visual Cues: As soon as you interact with the cache at the Su Durante Warehouse, observe your surroundings carefully. The game will typically spawn a series of visual indicators, often appearing as distinct footprints etched into the terrain or on surfaces. These footprints are your guide.
- Interpreting the Path: The footsteps will lead you in a specific direction, indicating the path to Tian Wen’s cache. It is vital to follow these cues meticulously. Deviating from the marked path can lead to disorientation and potentially expose you to unforeseen dangers. The developers have designed this segment to be a test of observation rather than combat prowess.
- The Buried Box: Your pursuit of the footsteps will ultimately lead you to a specific point where the trail culminates. Here, you will find a box buried in the sand. This buried box is the objective marker for the second part of the Marked for Death quest.
- Interaction and Completion: Similar to the first phase, interacting with this buried box will trigger the final quest update. This action signifies the successful completion of the Marked for Death quest in its entirety.
Unlocking the Marked for Death Quest: Prerequisites
It is important to note that the Marked for Death quest does not become available from the outset of your ARC Raiders experience. Players looking to undertake this mission must first achieve a certain progression milestone. Specifically, the Marked for Death quest will only become accessible once you finish the Broken Monument mission. Ensure that this prerequisite mission is completed before attempting to locate the Su Durante Warehouse or search for Tian Wen’s cache.
Strategic Considerations for Navigating the Marked for Death Quest
While the quest itself is designed to be relatively straightforward in its objectives, the surrounding environment of ARC Raiders presents inherent risks that demand strategic planning and execution. Successfully completing the Marked for Death quest is not just about finding the items; it’s about doing so with minimal expenditure of resources and, crucially, ensuring your survival to reap the rewards.
Preparing for the Expedition
Before even initiating the quest, a degree of preparation can significantly improve your odds of success.
- Gear and Loadout: While the Marked for Death quest is not typically a high-combat mission, being prepared for unexpected encounters is wise. Ensure your weapon is adequately loaded, and consider carrying a basic medkit or healing item. Early-game weapons are generally sufficient, but understanding their effectiveness against common ARC enemies in the Buried City is beneficial.
- Resource Management: Ammunition and medical supplies are finite resources. Avoid unnecessary engagements during your search. The goal is to locate the objectives efficiently. Every bullet fired and every medkit used detracts from your overall survival chances during extraction.
- Squad Coordination (If Applicable): If you are playing in a squad, clearly communicate your intentions and the current objective. Designate roles, such as a scout to identify potential threats or a point person to follow the footsteps. Coordinated movement and communication are invaluable in mitigating risks.
Navigating the Buried City Safely
The Buried City is a zone that often hosts a variety of threats. Being aware of these can help you avoid costly encounters.
- Enemy Spawns: Familiarize yourself with common ARC enemy patrol routes and spawn points within the Buried City. While the quest path might lead you through certain areas, anticipating potential ambushes allows for better evasion or preparation. Look for visual cues like disturbed ground, deployed turrets, or the distinctive sounds of ARC enemy units.
- Player Encounters: The Buried City is a popular drop zone and traversal area, meaning you are likely to encounter other human players. These encounters can range from neutral to hostile. Assume any player you see could be a threat. Use cover extensively, and always be aware of your six. If you spot another player, assess the situation: can you avoid them, or is an engagement necessary? Often, avoiding conflict and prioritizing your objective is the wisest course of action.
- Environmental Hazards: Beyond enemy threats, the Buried City might contain environmental hazards. Be mindful of unstable structures, hazardous waste zones, or other interactive elements that could cause damage or alert enemies.
Maximizing Efficiency in Footstep Following
The second phase of the Marked for Death quest hinges on your ability to accurately follow the footsteps.
- Environmental Awareness: While the footsteps are the primary guide, also pay attention to the broader environment. This can help you confirm your direction and avoid getting lost if the footsteps are momentarily obscured or difficult to discern. Look for changes in terrain, landmarks, or the general flow of the landscape.
- Minimizing Distractions: Resist the urge to engage in unnecessary combat or looting while following the footsteps. Your primary objective is to reach Tian Wen’s cache as quickly as possible. The faster you complete this phase, the less time you are exposed to potential threats.
- Confirmation of Cache Location: The description of the buried box implies it is a distinct object. Upon reaching the end of the footprint trail, thoroughly search the immediate vicinity for this object. It will likely be a container, a crate, or a similarly interactive element that stands out from the sandy terrain.
The Spoils of Victory: ARC Raiders Marked for Death Quest Rewards
Successfully completing any objective in ARC Raiders is intrinsically rewarding, but specific quests are designed to provide tangible upgrades to your arsenal and workshop. The Marked for Death quest is no exception, offering valuable attachments that can enhance your combat effectiveness.
Understanding the Quest Rewards
Upon the successful completion of both phases of the Marked for Death quest, you will be awarded a specific set of items designed to bolster your combat capabilities. These are not just cosmetic items; they are functional enhancements that can make a noticeable difference in your engagements.
- Shotgun Choke II: This attachment is a significant upgrade for any shotgun user. A Shotgun Choke primarily affects the pellet spread of a shotgun. The “II” designation indicates a higher tier of this attachment, suggesting it provides a more substantial improvement than its “I” counterpart. Generally, a Shotgun Choke tightens the pellet spread, which means the pellets travel in a more concentrated pattern. This leads to increased damage at longer ranges for shotguns, making them more versatile and effective beyond their typical close-quarters role. For players who rely on shotguns or wish to experiment with them, the Shotgun Choke II is an excellent reward that can improve accuracy and lethality.
- Angled Grip II: The Angled Grip is a versatile attachment that typically improves the handling and stability of firearms. The “II” again signifies a superior version of this attachment. An Angled Grip often provides benefits such as reduced aim-down-sight (ADS) time, meaning you can bring your weapon to bear on a target faster. It can also contribute to improved weapon stability or recoil control, making it easier to keep your reticle on target during sustained fire. For any weapon type, a faster ADS time and better stability are crucial for winning firefights, especially against skilled opponents. The Angled Grip II is a valuable addition to almost any weapon, enhancing both offensive and defensive capabilities.
The Crucial Step: Successful Extraction
It is vital to remember that acquiring these rewards within the game is only half the battle. The game mechanics of ARC Raiders dictate that any items obtained, including quest rewards, are only permanently added to your inventory upon successful extraction.
- Extraction Zones: As you progress through ARC Raiders, you will encounter designated extraction zones. These are points on the map where you can signal for your extraction vehicle or aircraft.
- Survival Post-Quest: After completing the Marked for Death quest, your immediate priority should shift to reaching an extraction zone. This often involves navigating back through potentially dangerous territory, as other players or ARC enemies may be drawn to the activity or seeking to intercept players attempting to leave.
- Securing Your Rewards: Do not underestimate the importance of extraction. Dying before reaching an extraction zone means losing all the loot and quest rewards you have acquired during that mission, including the Shotgun Choke II and Angled Grip II. Prioritize reaching safety and securing your hard-earned gains.
By understanding the nuances of the Marked for Death quest, from its precise locations to the strategic approaches required for navigation and the valuable rewards it offers, players can confidently tackle this early to mid-game objective. Remember to prepare adequately, move with purpose, and always prioritize a successful extraction to bring your new gear back to your Workshop and dominate the battlefields of ARC Raiders.