How to Care for Your Leather Outback Hat and Make It Last: A Comprehensive Guide
At Gaming News, we understand that your leather outback hat is more than just an accessory; it’s a statement of rugged style, an emblem of adventure, and a trusted companion for countless journeys. To ensure this iconic piece of headwear not only withstands the elements but also grows more distinguished with age, a commitment to meticulous care is paramount. This comprehensive guide will equip you with the knowledge and techniques necessary to preserve the integrity, enhance the aesthetic, and significantly extend the lifespan of your cherished outback hat. We will delve into every facet of leather hat care, from initial understanding to advanced maintenance, ensuring your hat remains a source of pride for years to come.
Understanding the Essence of Your Leather Outback Hat
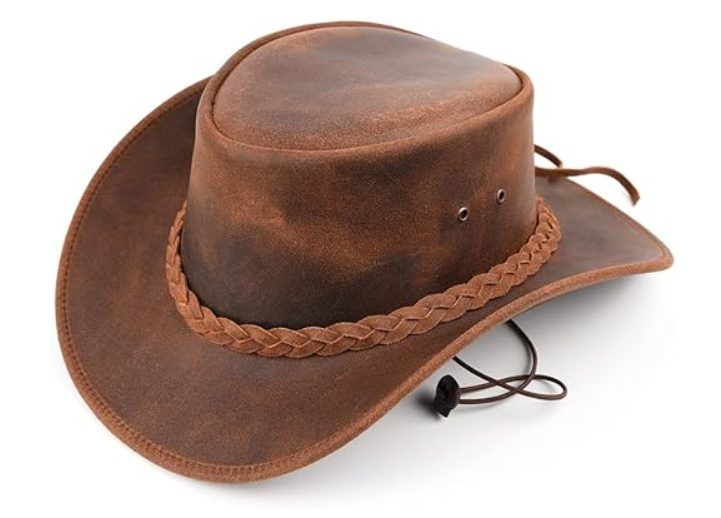
The leather outback hat, often recognized for its distinctive wide brim and often creased crown, is deeply rooted in the adventurous spirit of Australia. Traditionally crafted from robust, often oiled, leathers, these hats were designed to protect wearers from the harsh sun, sudden downpours, and the general rigors of outdoor life. The very nature of the leather outback hat dictates a need for specific care. Unlike synthetic materials, leather is a natural, porous substance that requires conditioning, protection, and gentle handling. Its ability to develop a rich patina over time is one of its most desirable qualities, a testament to its history and the experiences it has shared with its owner. Understanding this inherent duality of durability and delicate needs is the first step towards effective preservation. The type of leather used, whether it’s a smooth full-grain, a textured nubuck, or a naturally oiled finish, will influence the precise care regimen. We will address these variations to provide a holistic approach to leather outback hat maintenance.
Initial Preparation: Preparing Your Hat for Long-Term Care
Before embarking on any cleaning or conditioning process, it’s vital to understand your hat’s current state. A thorough visual inspection is the crucial first step. Look for any obvious signs of wear, such as dried-out areas, fading, stiffness, or particularly stubborn dirt. Gently brush away any loose dust or debris with a soft-bristled brush, ensuring you work with the grain of the leather. For hats with decorative elements like hatbands or feathers, these should also be carefully inspected and cleaned separately if necessary, taking care not to damage them during the hat’s primary cleaning.
The Art of Cleaning Your Leather Outback Hat: Gentle Yet Effective Techniques
Cleaning your leather outback hat requires a nuanced approach that prioritizes the preservation of the leather’s natural oils and integrity. Harsh chemicals or abrasive scrubbing can lead to irreversible damage, stripping the leather of its suppleness and creating a brittle, cracked finish. Our recommended methods focus on gentle yet thorough cleaning to remove dirt, grime, and everyday wear without compromising the hat’s character.
Basic Cleaning for Everyday Grime
For routine cleaning, a damp cloth is often your most effective tool. Use a clean, soft cloth that has been slightly dampened with water. Avoid soaking the cloth, as excessive moisture is detrimental to leather. Gently wipe down the surface of the hat, paying close attention to areas where dirt tends to accumulate, such as the brim and the band. Work in small sections, and immediately follow with a dry, soft cloth to remove any residual moisture. This simple yet consistent practice can prevent dirt from becoming embedded and making more intensive cleaning necessary later.
Tackling Stubborn Stains and Marks
When faced with more persistent stains, such as mud splatters or minor grease marks, a specialized leather cleaner becomes essential. Look for a cleaner specifically designed for natural leather or, ideally, for hat leather. Always test the cleaner on an inconspicuous area of the hat first, such as the underside of the brim, to ensure it doesn’t cause discoloration or damage. Apply a small amount of the cleaner to a clean cloth and gently rub the stained area in a circular motion. Avoid excessive pressure. After cleaning the stain, wipe the area with a clean, damp cloth to remove any cleaner residue, and then dry thoroughly with a soft, dry cloth. For oil-based stains, a small amount of cornstarch or talcum powder can sometimes be effective. Apply the powder to the stain, let it sit for a few hours to absorb the oil, and then gently brush it away. Repeat if necessary.
Deep Cleaning for Revitalization
If your hat has undergone significant exposure to the elements or has been stored for an extended period, a deeper cleaning may be required. This process should be undertaken with extreme care. Some specialized leather cleaning soaps are designed for this purpose. Apply the soap sparingly according to the manufacturer’s instructions, typically using a slightly damp cloth. Work the lather gently into the leather, focusing on areas that appear dull or soiled. Immediately after, remove all soap residue with a clean, damp cloth, ensuring no traces are left behind. The hat must then be allowed to air dry naturally away from direct heat sources.
The Crucial Role of Conditioning: Restoring and Protecting Your Leather Hat
Cleaning can strip leather of some of its natural oils. Leather conditioning is the vital next step to replenish these oils, restoring suppleness, preventing dryness and cracking, and enhancing the leather’s natural sheen. This process is what truly gives your outback hat its longevity and that desirable, well-worn character.
Choosing the Right Leather Conditioner
The market offers a variety of leather conditioners. For outback hats, we recommend conditioners that are natural, oil-based, and specifically formulated for full-grain or oiled leathers. Avoid products containing harsh solvents, silicones, or petroleum distillates, as these can damage the leather over time. Products containing natural ingredients like lanolin, beeswax, or mink oil are generally excellent choices, offering deep nourishment and protective qualities. Always select a conditioner that is compatible with the specific type of leather your hat is made from.
The Conditioning Process: A Step-by-Step Approach
- Ensure the Hat is Clean and Dry: Never apply conditioner to a dirty or wet hat. This can push dirt deeper into the leather or trap moisture.
- Apply Sparingly: Using a clean, soft cloth, apply a small amount of conditioner to the cloth, not directly to the hat. Rub the conditioner into the cloth in a circular motion.
- Work into the Leather: Gently rub the conditioned cloth over the surface of the hat, working in small sections. Pay attention to areas that feel dry or stiff. Ensure even application across the entire hat, including the brim and the crown.
- Allow Absorption: Let the conditioner penetrate the leather for the time recommended by the product’s manufacturer. This usually ranges from a few hours to overnight. During this period, the leather will absorb the nourishing oils.
- Buff for Shine: Once the conditioner has been absorbed, use a clean, dry cloth to gently buff the surface of the hat. This will remove any excess product and restore a natural sheen. The amount of buffing can be adjusted to achieve your desired level of shine.
Regular conditioning, perhaps every 6-12 months depending on usage and climate, is key to maintaining the leather’s flexibility and preventing premature wear.
Protecting Your Hat from the Elements: Weatherproofing and UV Defense
Your leather outback hat is designed to withstand the outdoors, but providing it with extra protection can significantly enhance its durability and appearance.
Waterproofing and Water Resistance
While many outback hats are made from naturally water-resistant leather, additional protection can be beneficial, especially in regions with frequent or heavy rainfall. Waterproofing sprays or waxes specifically designed for leather can create a barrier against moisture. When applying a waterproofing product, ensure the hat is clean and dry. Spray or apply the product evenly, following the manufacturer’s instructions carefully. Allow the hat to dry completely in a well-ventilated area. It’s important to note that excessive waterproofing can sometimes affect the leather’s breathability, so aim for a balanced approach. Reapplication may be necessary after prolonged exposure to wet conditions or after significant cleaning.
UV Protection
Sunlight, while often a welcome companion during outdoor adventures, can be harsh on leather, leading to fading and drying. While conditioning helps combat dryness, applying a product with UV inhibitors can offer an additional layer of defense against sun damage. Some leather conditioners include these protective properties. Alternatively, you can look for specialized UV protectants for leather. These can help preserve the rich color and integrity of your hat, especially if it is exposed to direct sunlight for extended periods.
Proper Storage: The Foundation of Longevity
How you store your leather outback hat when it’s not in use plays a critical role in maintaining its shape and preventing damage. Improper storage is a common culprit behind misshapen brims and flattened crowns.
Maintaining the Crown and Brim Shape
The most crucial aspect of hat storage is preserving its intended form. A hat stretcher or a clean, rolled-up t-shirt can be placed inside the crown to maintain its shape. For the brim, placing the hat on a flat surface is ideal. If stacking is unavoidable, ensure there is adequate padding or that no weight is placed directly on the brim. Storing your hat upside down, resting on its crown, can also help protect the brim’s integrity.
Ideal Storage Environments
The best place to store your leather outback hat is in a cool, dry, and well-ventilated environment. Avoid attics, basements, or garages that experience extreme temperature fluctuations or high humidity, as these conditions can promote mold growth, warping, and drying. A closet or a dedicated shelf is generally a good option.
Using a Hat Box for Protection
For the ultimate in protection, investing in a hat box is highly recommended. A sturdy hat box will shield your hat from dust, light, and accidental bumps. Ensure the hat box is appropriately sized for your outback hat and that it allows for adequate air circulation. Some hat boxes are lined with acid-free paper, which can further protect the leather from degradation.
Addressing Specific Issues: Wrinkles, Scratches, and Fading
Even with the best care, your leather outback hat might encounter minor issues over time. Fortunately, many of these can be addressed with the right techniques.
Minimizing Wrinkles and Creases
Minor wrinkles can often be smoothed out through the regular conditioning process. As the leather absorbs the conditioner, it will naturally become more pliable, and light creases may diminish. For more stubborn wrinkles, you can try gently stretching the affected area while applying conditioner. Avoid using heat, as this can set wrinkles permanently and damage the leather.
Dealing with Scratches and Scuffs
Light scratches and scuffs are part of a well-loved leather hat’s character. For minor abrasions, the natural oils from conditioning can often help to blend them in. If a scratch is more prominent, you can try gently rubbing it with a small amount of leather conditioner or a matching color leather balm. For deeper scratches, a leather repair kit designed for the specific color and type of your hat might be necessary, but these should be used with extreme caution and preferably by someone experienced in leather repair.
Rejuvenating Faded Leather
Fading, particularly in colored leather hats, is often due to sun exposure. If the fading is uniform, a high-quality leather dye or a tinted leather conditioner can help restore the original color. Always test these products on an inconspicuous area first. Remember that mimicking the original color perfectly can be challenging, so embrace the subtle variations that may occur. Oiled leather hats will naturally darken and develop a richer patina with age and exposure, which is often considered a desirable aesthetic.
The Importance of Hatbands and Linings
Don’t forget the supporting elements of your outback hat.
Caring for Hatbands
Many outback hats feature decorative hatbands made from leather, fabric, or other materials. These should be cleaned according to their specific material. Fabric hatbands can often be spot-cleaned with mild soap and water, while leather hatbands should be treated similarly to the hat itself. Ensure any cleaning agents used on the hatband do not bleed onto the leather.
Maintaining the Interior Lining
The interior lining of your hat absorbs sweat and can harbor bacteria. Regularly inspect the lining for signs of wear or discoloration. For most fabric linings, gentle spot cleaning with a mild detergent and a damp cloth is sufficient. Allow the lining to air dry completely before wearing the hat again. For particularly persistent odors, a specialized hat deodorizer or a light dusting of baking soda inside the crown (left for a few hours and then brushed out) can be effective.
Making Your Leather Outback Hat Last: A Philosophy of Respectful Ownership
Ultimately, making your leather outback hat last is about adopting a philosophy of respectful ownership. This means understanding the material, treating it with care, and investing a small amount of time in regular maintenance. Your leather outback hat is not a disposable item; it is a heritage piece that can provide decades of reliable service and enduring style. By following these detailed steps, you are not merely cleaning and conditioning; you are preserving a legacy, ensuring that your hat continues to tell its story for many adventures to come. The patina it develops will be a roadmap of your experiences, a testament to its quality and your dedication to its care.
Your commitment to these practices will ensure that your leather outback hat remains a cherished, functional, and stylish companion, outranking its peers not just in durability, but in the rich character it embodies. The investment in proper care is an investment in timeless quality.